Back in 2004, when I had my lovely Hitachi PJ-TX100 projector, I remember the struggle of dealing with its meager brightness while projecting onto a small 60-inch tripod manual screen. I was desperately searching for a screen upgrade when I accidentally discovered the Celexon brand, a German company that had launched just one year earlier, in 2003! Not long after, a nice 92-inch matte white Celexon electric screen proudly hung from my living room ceiling. What an upgrade it was! The size, the electric motor, the remote control, the smooth surface, everything seemed out of this world to me. For the record, I still have this screen somewhere in my storage.
And here we are, exactly 20 years later, finding myself in front of perhaps the most advanced and sophisticated screen ever made for home cinema use—and guess what, it had the Celexon logo on it. I’m generally an emotional person, and I can’t hide it, twenty years, guys. Twenty years of life, twenty years experiencing this amazing evolution of technology in every field, twenty years enjoying and following the projection revolution in my living room. Where do we go as humanity? Are we alone in the universe? ( Just joking 🙂 ). These were my thoughts as I unboxed this new Celexon screen.
From the low-resolution and weak brightness projectors with lamps, playing on a simple white fabric where you had to be in a totally dark environment to watch your movie, with so many concessions in terms of image quality, to the powerful laser ultra-short-throw 4K HDR projectors and those revolutionary screens that allow us to watch even in daylight with almost zero loss of quality.
All these years of evolution in home projection, as in any field, led to the revolutionary moment about 4 years ago with the appearance of the new generation of Laser UST projectors and, of course, the special CLR screens. Oh boy, what a huge step forward.
Today in this article, as perhaps you already guessed, we will talk about the UST screen revolution, and to be more specific, I will test and present to you the newest Celexon CLR floor-rising UST “plus” screen.
This screen, apart from adding the prefix “plus” to its name, incorporates some of the latest technologies that the screen industry can offer today, all wrapped up in an amazing and unique design.
Let’s take a look
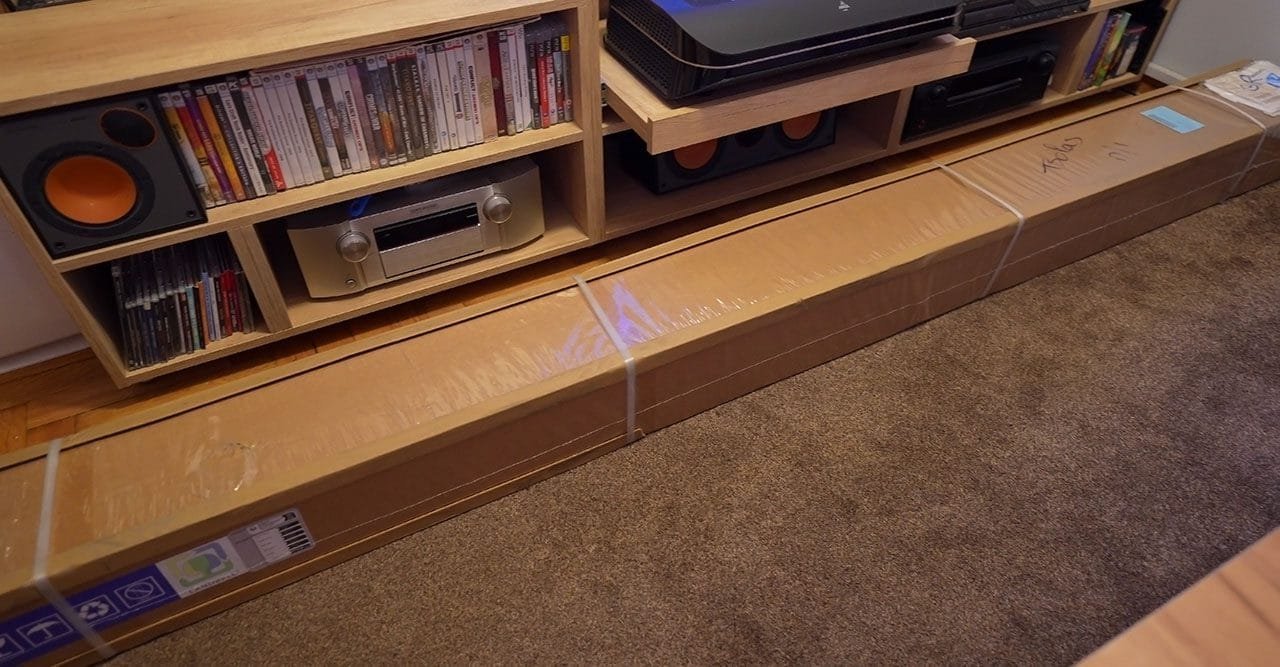
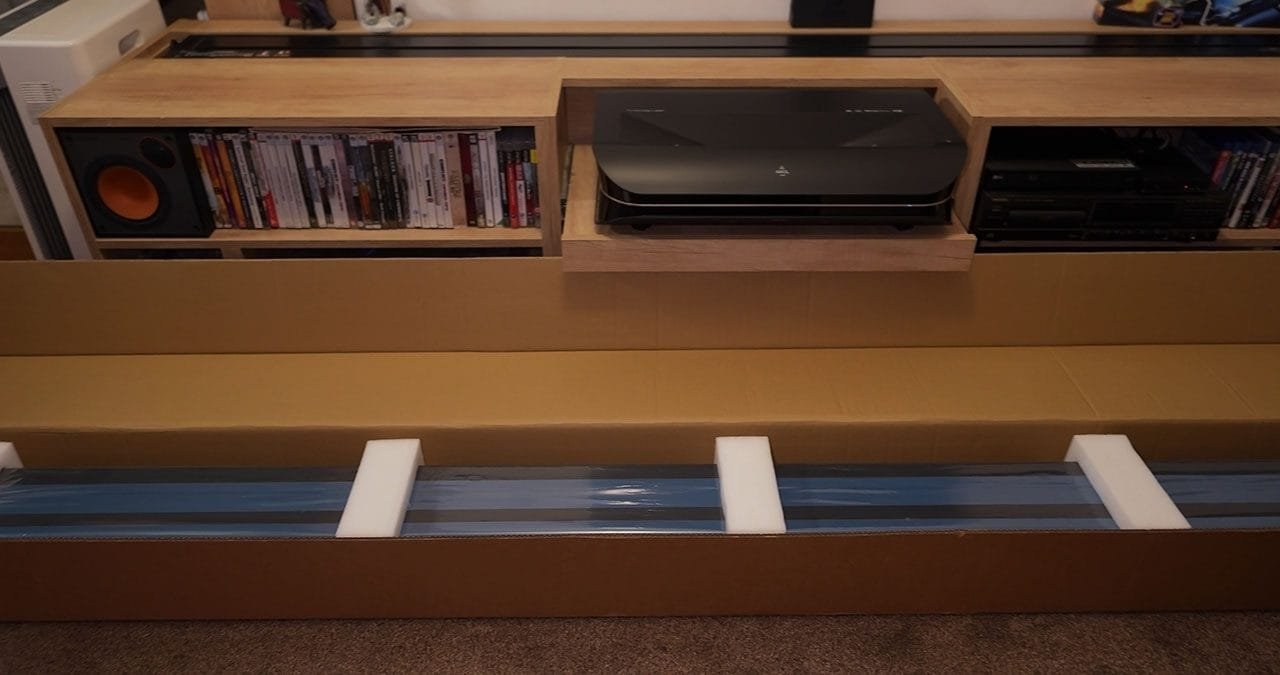
The box arrived at my house one morning about a month ago, and it was enormous (or perhaps my house is small, lol). When I say enormous, I mean a box over 270cm in length (~9 feet) and weighing 24kg (53lbs) of pure aluminum inside. That’s truly massive.
After I managed to unbox the screen, I had to peel off all those blue protective stickers covering the aluminum surface from edge to edge. Strangely, I always enjoy doing that! There’s something about that noise, it’s quite addictive, isn’t it?
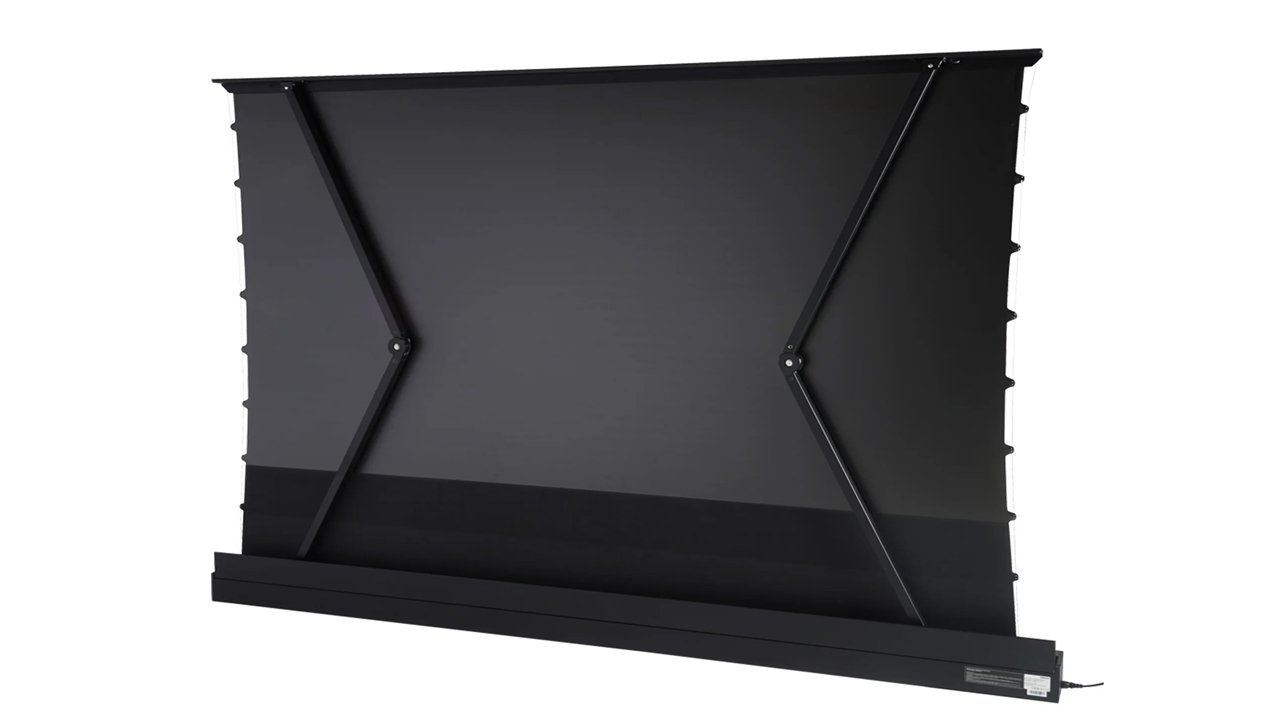
The screen housing material is full aluminum, like all high-level ALR Celexon screens. It is black painted (there is also a white version available) with a matte finish.
The build quality of the screen housing/frame is top-notch, with thick aluminum that makes the screen as sturdy as a tank. You can feel this when you try to transport or move the screen, there is not even the slightest hint of distortion in the housing frame. It feels like the entire housing and its contents are one solid aluminum casting, rather than just assembled pieces.
The paint has a smooth, lightly textured finish, and the flawless uniformity across the entire surface indicates high-quality powder coating that will protect the frame well from scratches and wear over time. It also gives the housing a luxurious appearance.
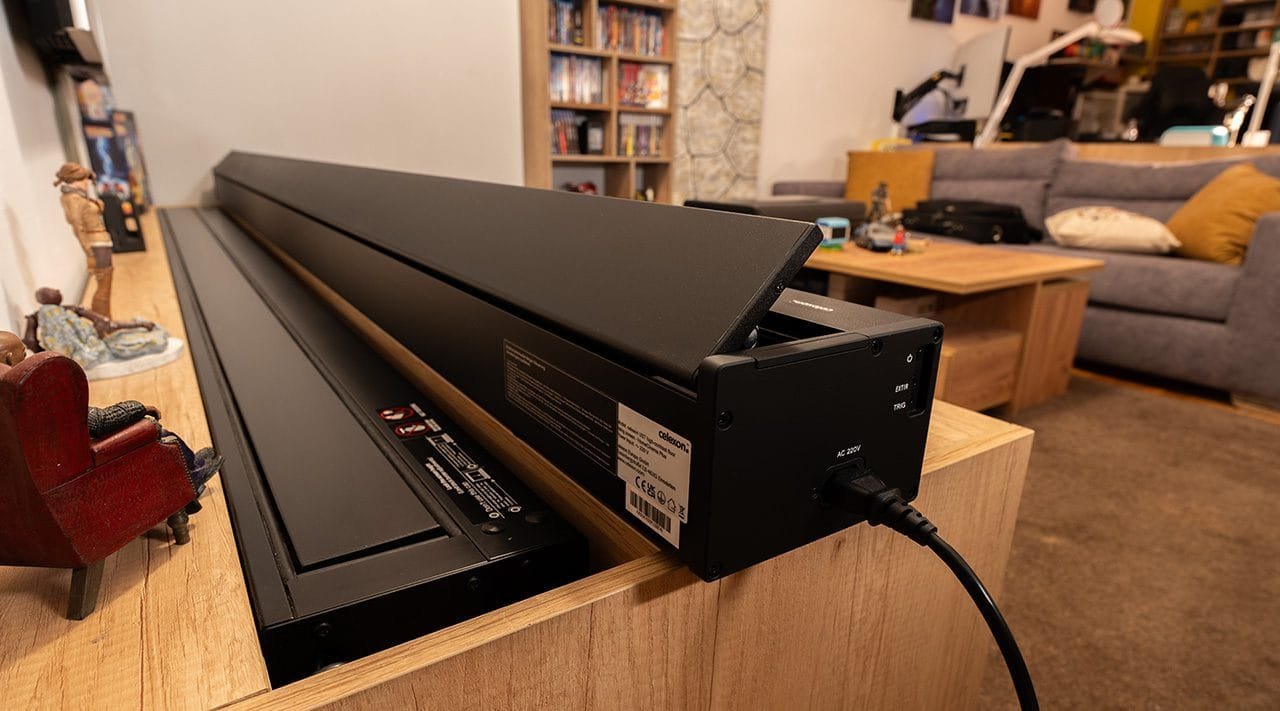
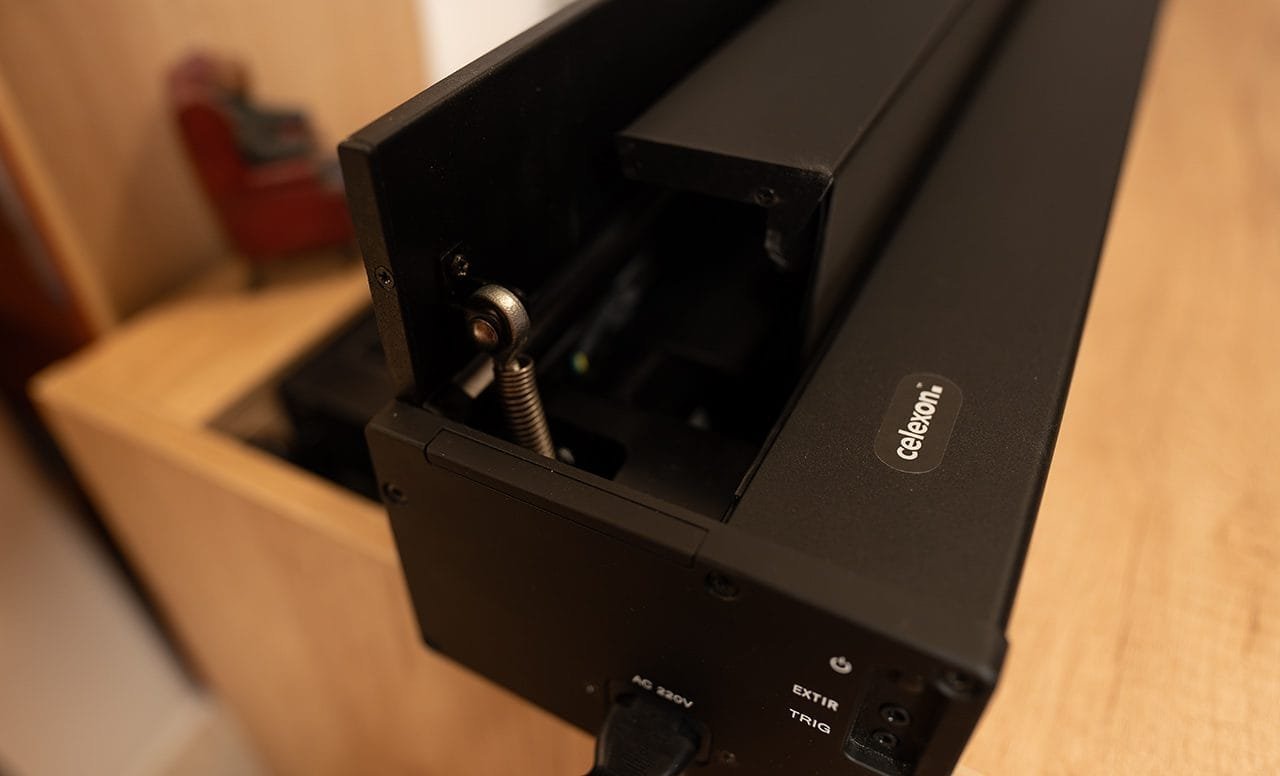
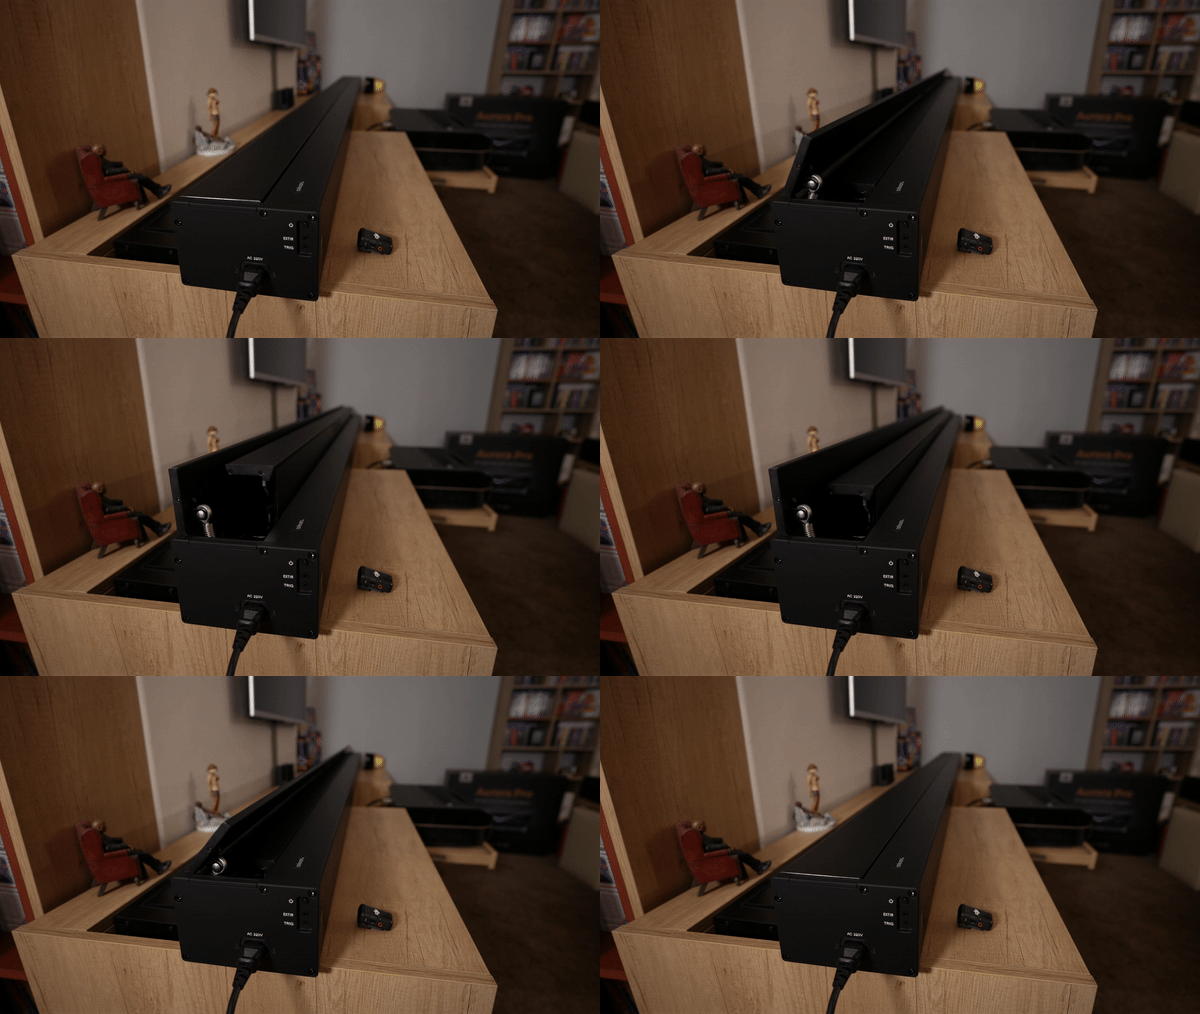
And now, we come to the first design award that I have to give to the Celexon department of research and development. This award goes to none other than the amazing moving protection flap of the screen. This feature alone was what initially drew my attention and made me want to see and try out this screen in first place. It caught my eye right from the start.
That flap works with a separate motor, and its job is to seal the fabric roll and the entire interior of the housing when the screen is retracted, protecting it from dust or any other external factors. It’s not just the great idea that the Celexon team had, the implementation itself is also impressive. The construction is simple, the design is clear, the mechanism is efficient, it operates totally silently, and its movements are precise and smooth.
The flap rise and the screen pops out like a well-tuned Swiss watch
To give you an idea of how well-designed and built this flap is, the axis of it could easily butt against the side panels of the frame with just a simple housing hole on both sides, and I guess it would work just fine. However, Celexon decided to use sealed bearings in the axis housings on both sides to do the job. This ensures a smooth, precise, and noise-free operation and also ensures the longevity of the entire mechanism.
But Celexon didn’t stop there. Even without any gap between the flap and the frame when it’s closed, dust always finds a way to penetrate. For that reason, they also installed rubber around the entire resting space of the flap when it is in the closed position, achieving a hermetic seal that prevents any dust particles from penetrating the housing and settling inside the screen.
Last but not least, Celexon designed the small arm (connecting the flap to the motor) of the flap as a shock absorber. This allows it to extend 1-2cm if a finger comes across the housing opening when the flap is closing and also ensures that the flap will maintain some small pressure on the housing rubber for perfect environmental isolation.
Basically, when you finish your movie and retract your screen, the wrapped fabric will remain absolutely sealed until the next time you use it.
This is something I miss so much on my Vividstorm, as I’ve been battling dust inside the housing for 3 years now. It’s a battle you can’t win, trust me on that. My Vividstorm has some serious gaps when the fabric is fully retracted, and dust permeates inside the housing through those gaps. Generally speaking, dust isn’t the best friend for CLR screens.
I even bought a Winix air cleaner and placed it next to my furniture. It wasn’t a big win, but it helped.
Another detail that impressed me and is incredibly clever, useful, and practical is the two small hidden rising carrying handles integrated into the side panels of the screen housing. With these small handles, you can easily insert the screen into furniture (like mine) or remove it, or simply move (or raise) the screen to access your cables, etc.
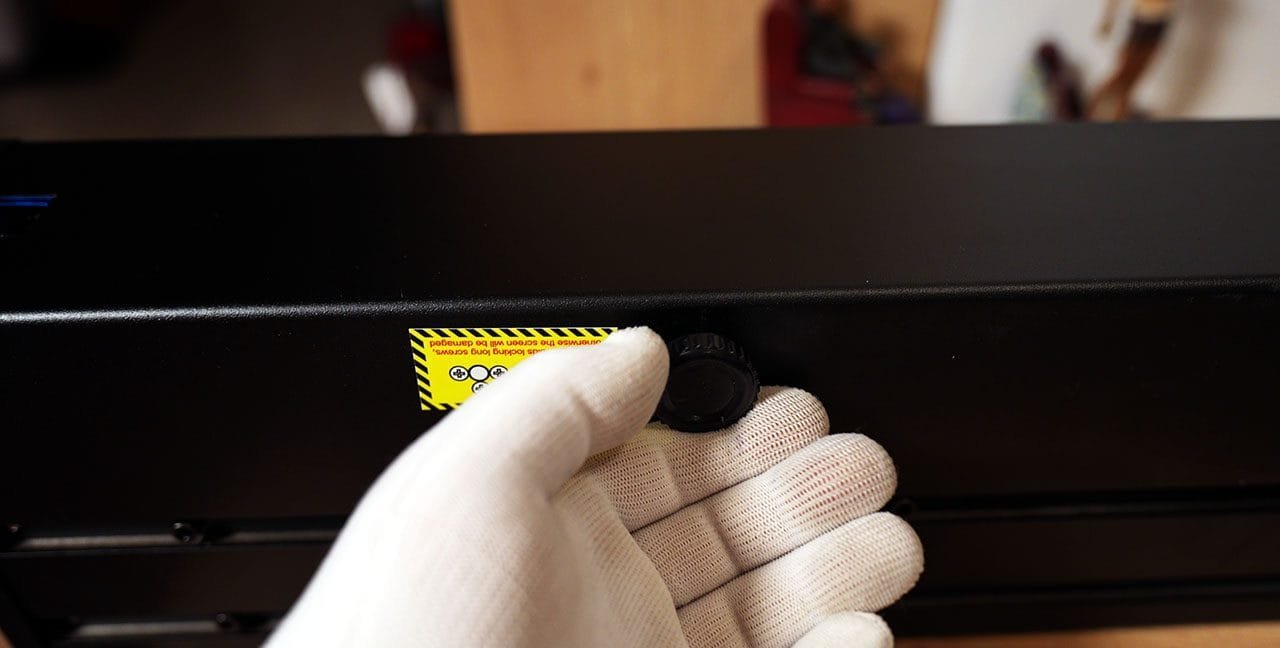
On the bottom of the screen, someone finally thought about it and made it happen! I’m speaking about the four rotary feet that allow you to make small tilt adjustments. In cooperation with your projector, you can achieve the perfect rectangular image frame in a minute. At last!
The screen sits on four adjustable feet, allowing you to perfectly adjust the tilt
All those small practical details make a difference to me, I can’t overlook them. They make the installation so much easier. Celexon seems to have made no concessions on the quality of the build when they designed and built this screen. It is evident to me that they wanted to create the ultimate (and practical!) screen, regardless of cost and time, and they succeeded, in my opinion. At least as far as the housing design and construction are concerned.
What comes with Celexon CLR floor rising screen
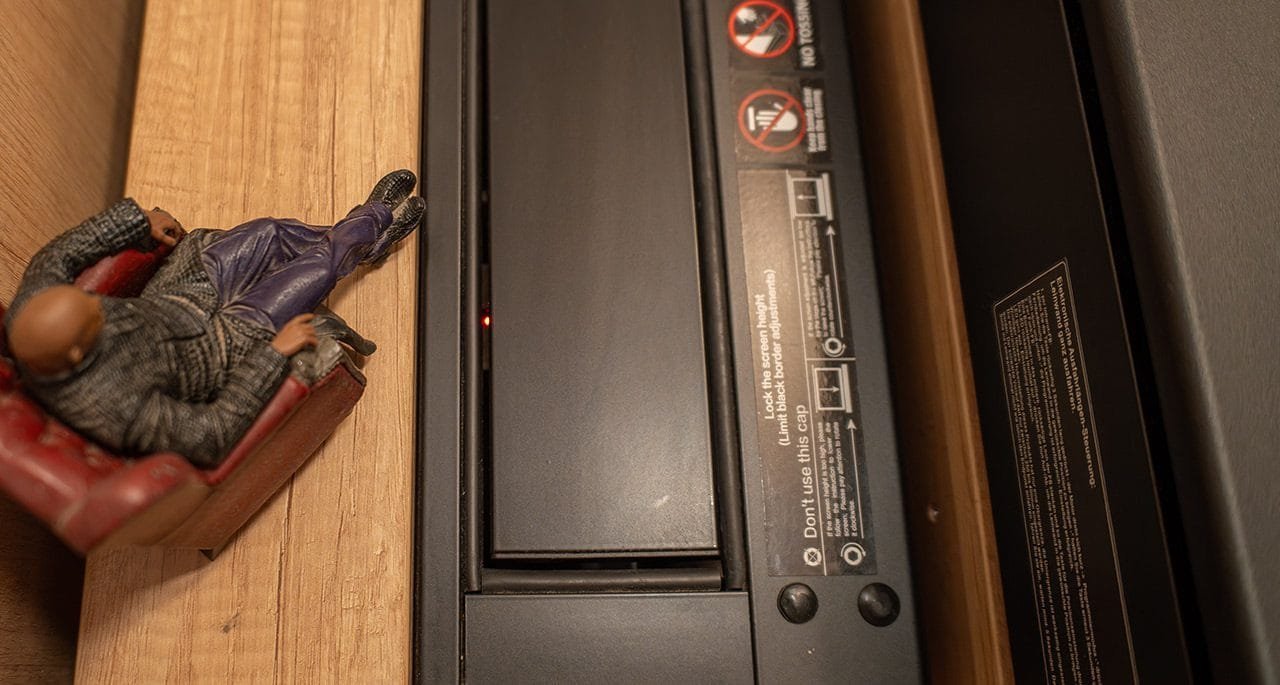
The screen also comes with a box full of materials. Inside, you will find the classic two remote controls: one RF and one infrared. There are also two cornering adjustable brackets for easy wall installation behind your furniture. Additionally, there’s a screwdriver and an Allen key to adjust the top stop end of the motor and, therefore, the height of the screen when fully extended.
Finally, a special soft brush is included to clean the screen surface if necessary, along with two cables: the USB cable for the trigger port and an extension cable for the infrared port. The housing of the screen also has an integrated IR sensor if there is no need to use the external one.
Connectivity
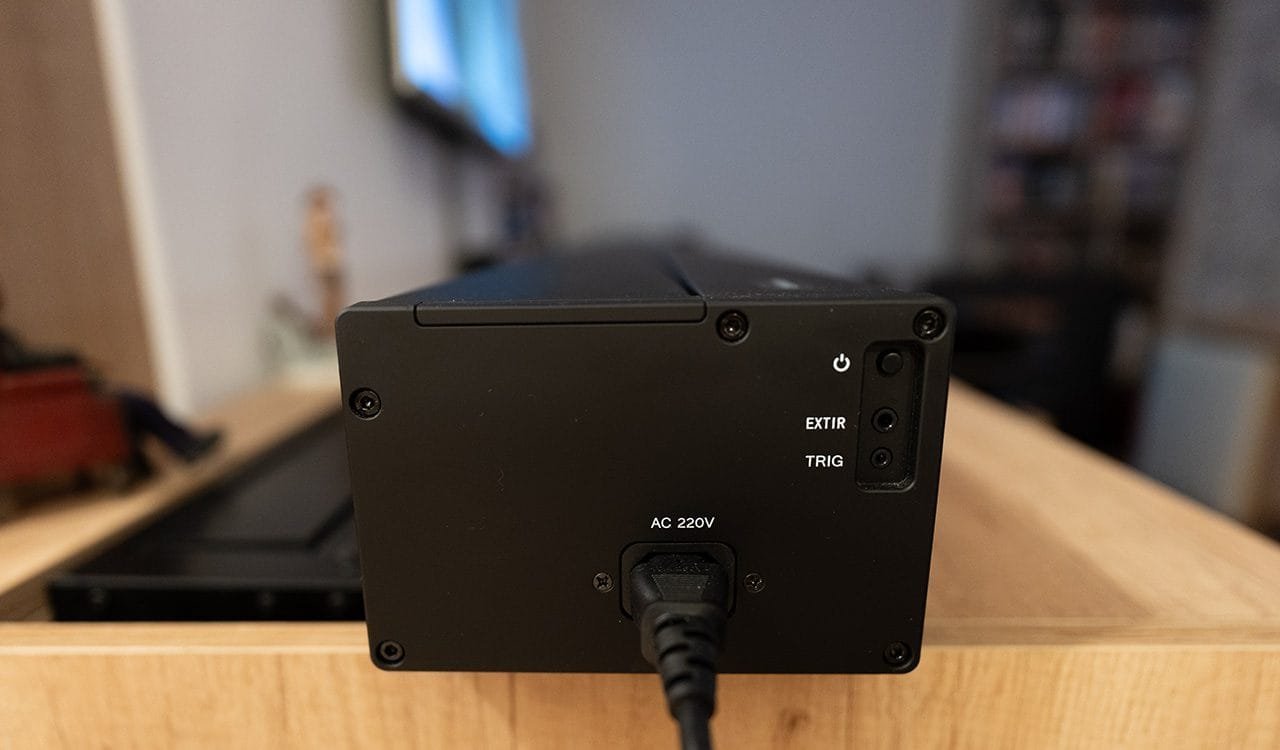
On the side panel, in addition to the classic power connector, there is a small button for operating the screen without a remote. There are also two extra ports: one for the external infrared sensor, useful if the screen is hidden in furniture and we want to operate it with the IR control, and the other is a trigger port for connecting our projector with the screen. This allows us to power on both devices with a single button press from our projector remote control. Overall, it’s a clean and neat design.
Size
The Celexon housing is quite large due to the inclusion of a second motor and the mechanism for the screen cover flap.
The dimensions of the housing are 245.1 x 15.2 x 10.9 cm (WxDxH), with a clean viewing area size of 227 x 125 cm and a 35cm black border below. The screen weighs 24 kg and is made entirely of aluminum. It is available in three main sizes: 100 inches, 110 inches, and 120 inches.
Celexon is larger than Vividstorm, both at the standard 100-inch size.

Let’s talk about that Celexon fabric
The technology behind this screen is the hot topic here, in my opinion. This floor-rising screen features one of the most advanced CLR fibers on the market right now.
Celexon claims to have developed this microscopic light grid structure using a totally new production process, increasing the number of directionally reflective blades on this fabric and improving the coating for absorbing and deflecting ambient light on the upper areas of the blades. The result is an outstanding high-contrast projection image in almost all lighting conditions. They call it Black Grid CLR technology fabric (the exact name being micron-scale black grid fiber), and it has a unique multi-layer design to increase black levels and minimize reflections from ambient light. Additionally, a special soft elastic black shiny layer is incorporated on the back of the fabric to ensure perfect tension of the screen over time, even if there is also the classic cable tensioning system.
This is how i captured the micro black fabric on my camera…
Wasn’t easy, i used my Sony a7cii and the 20mmf1.8 lens that is capable to focus really close to the subject
How it performs and how it looks that special Celexon CLR fabric
First of all, the shape of the fabric at the edges is not completely straight like my Vividstorm, but rather slightly curved. This is a common feature of tab-tensioned screens and is related to the tension system. The slight curve helps evenly distribute tension stress on the side surface where the cables touch the fabric, resulting in a well-known and successful tension design. While Vividstorm doesn’t follow this tensioned method, I have no complaints about its flatness over the past three years. So, I suppose both companies have their own methods of tensioning, and both work just fine.
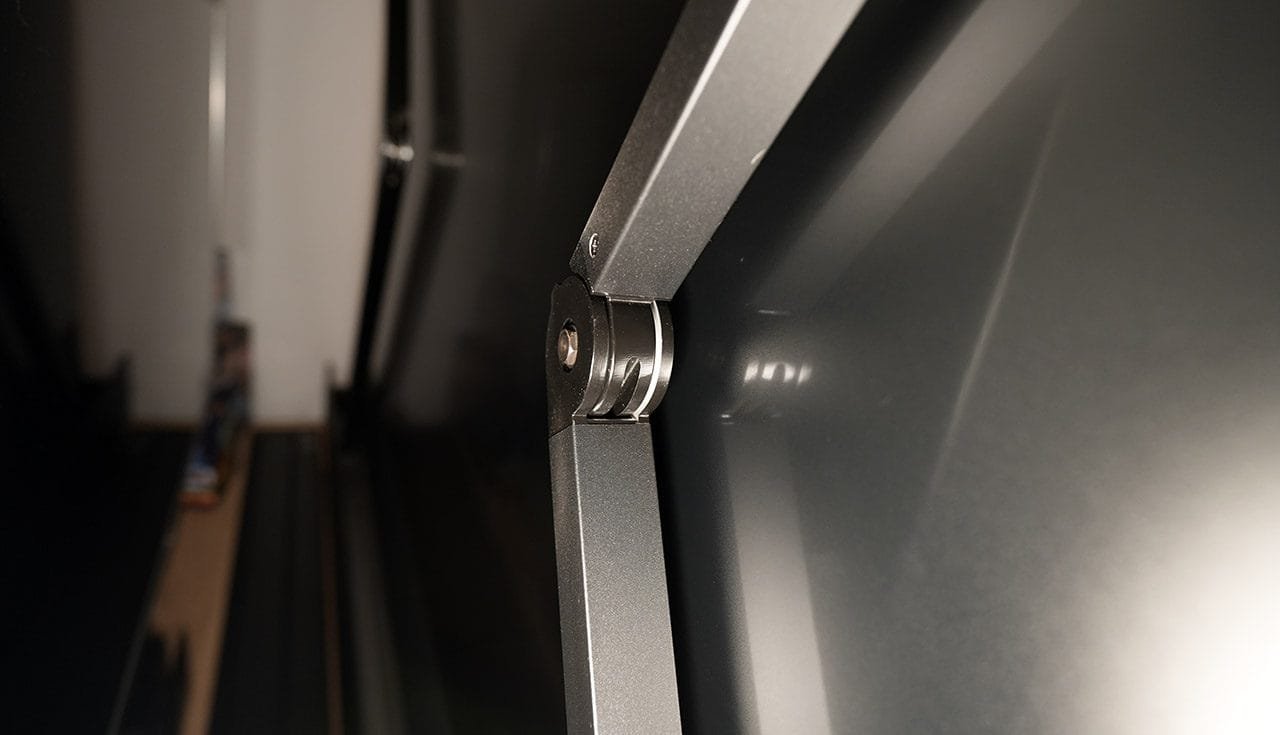
The surface flatness of the Celexon screen when fully extended is remarkable. It is perfectly flat from end to end, resembling a straight wall. Additionally, the horizontal stripes of rolling that this kind of fabric typically develops are barely visible on this screen, almost non-existent. The mechanism for extending the fabric is almost identical to that of the Vividstorm screen. It has two folding arms that act as a moving tension system to raise the top aluminum bracket and hold the fabric completely tensioned and flat throughout the process of extending and retracting.
It’s worth noting the presence of Teflon material in the joint to reduce noise and increase durability. The entire mechanism operates totally silently. Sometimes, the small details are enough to speak for the overall quality of a product.
This fiber boasts almost 40 perfectly aligned micro blades per centimeter (around 100 blades per inch!). Considering the height of the 100′ Celexon screen at 125 cm (~49 inches), this fabric has approximately 5,000 micro-directionally reflective blades in total! Quite impressive.
These micro blades are positioned at a 45-degree angle and are predominantly white on their bottom side, while completely black on the top side. Consequently, light coming from below is reflected directly towards the viewer (our eyes), while light from above is partially reflected away from the viewer due to the negative angle, with the remainder being absorbed by the black color.
As a bonus, here’s a picture captured by my portable microscope. You can clearly see the grey-white reflective coating and the black isolation layer.
And the one million-dollars question is, how come we don’t see an image sliced into small horizontal strips?
The answer to this question has two parts.
Firstly, the seamless and uniform image is achieved because of the sheer number of blades present in the fabric. With thousands of micro blades, there are enough to ensure that each horizontal line of the projected image aligns with a blade, resulting in a continuous and uninterrupted picture. In fact, the Celexon CLR screen boasts approximately 5,000 horizontal blades on a 100″ screen, which is more than sufficient even for 8K projection, given that 4K UHD has 2160 horizontal lines.
Secondly, the shape and angle of the blades play a crucial role. When the projector’s light beam encounters the fiber, it does so at an angle that makes each blade appear to seamlessly continue where the previous one ends. This means that there are no visible gaps between the blades, and all the pixels of the projected image encounter a surface along their path. Imagine your eyes in the position of the projector lens: what would you see? Just a flat white fabric. It becomes virtually impossible to distinguish where one blade ends and another begins, or even that there is a black top on them.
Indeed, the micro black grid technology ensures that the projected image reaches our eyes flawlessly, without any loss of information due to the unique angle of the screen’s reflective blades. You can gain a better understanding of this technology with the following two pictures.
When viewed from above, the fiber appears as a solid black surface—a “black hole” that prevents light from escaping…
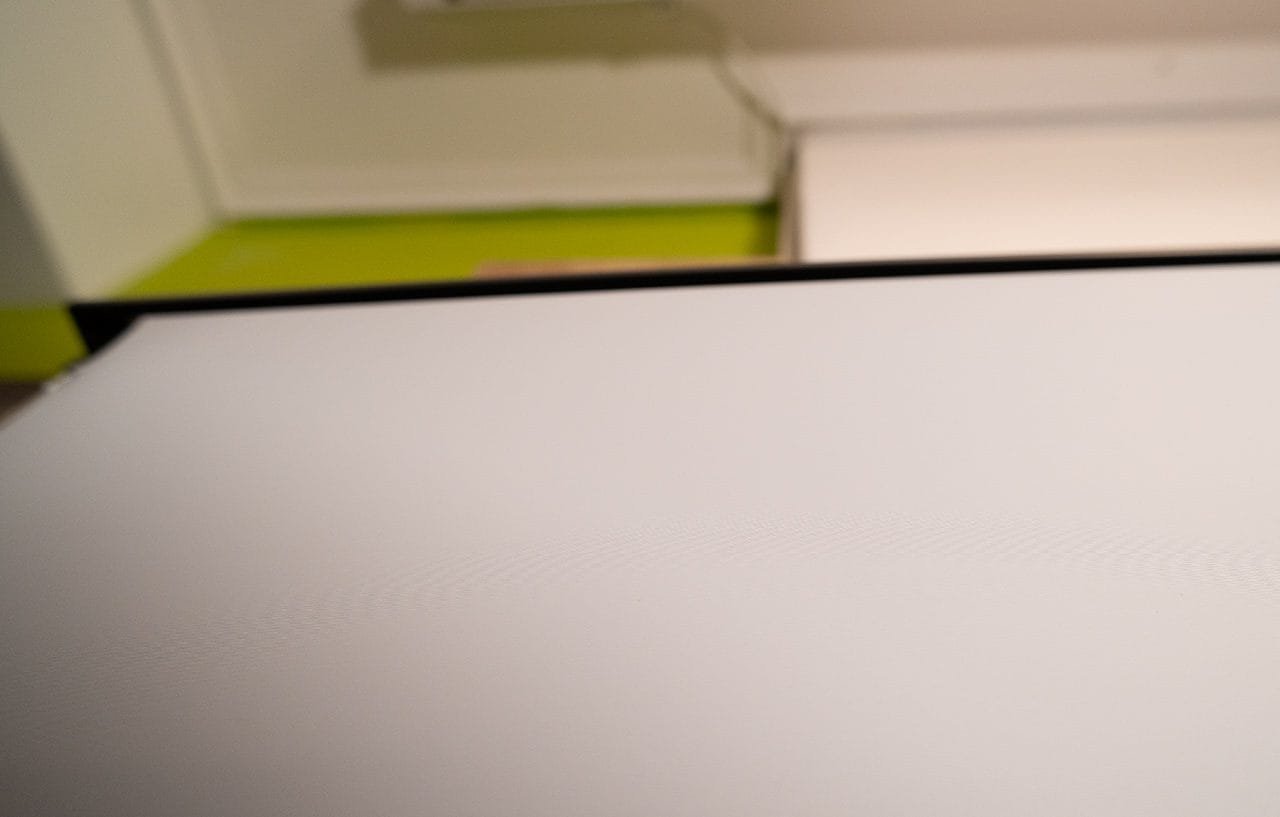
From the bottom, however, you see something entirely different, an almost normal white surface…
Pure magic to my eyes, what a technology. I am speechless…
And now comes the difficult part of this review. Remember, it took me almost a month to fully test this screen and draw my own conclusions. The whole procedure wasn’t easy at all, I must tell you. Consider this as a long-term review and not just a simple presentation of the screen.
Measurements
First of all, I had to establish a method. A method to measure the reflectivity of the screen, the color behavior, and the ambient light rejection rate. This method had to be as close as possible to actual viewing conditions. How my living room and the ambient light interacted with the Celexon screen would affect the picture quality, and that was my goal.
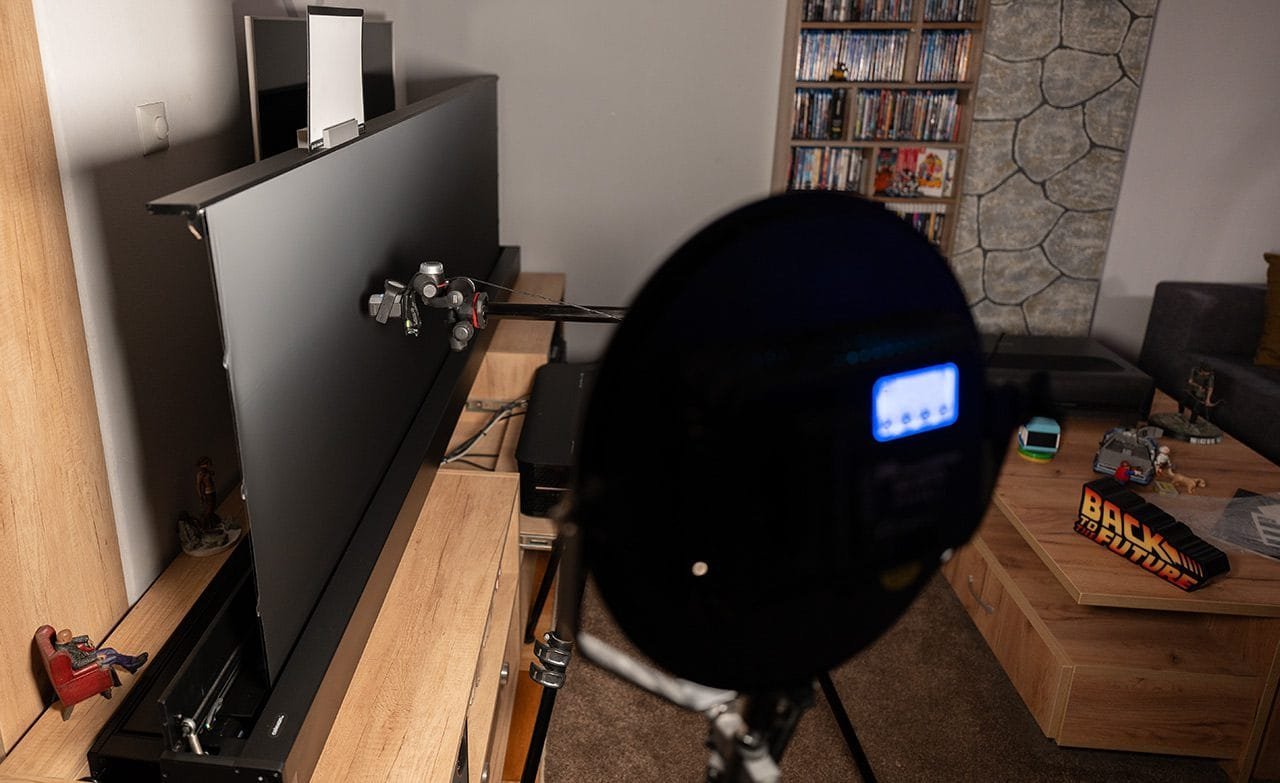
And thus, I created my own method. I used my AWOL projector and a white balance card from X-Rite as a reference for my measurements.
First, I had to print a base for the X-Rite card so I could fasten it on top of the screen. I printed it using my favorite Bambu Lab 3D printer.
First the design…
Second the printing…
And finally, the base was ready and placed on top of the screen, ready to provide us with the reference measurement.
When I wanted to measure the Celexon screen, I just raised it slightly so that the Celexon fabric was in front of my color meter instead of the white x-rite reference card, and vice versa. With this method, I had the two different surfaces exactly in the same spot when I took the measurements. Am I a genius or what? (Of course, I am not, I am just joking.)
I divided the measurement tests in five basic parts.
- RGB and Gamma screen behavior
- Ambient light rejection from above
- Ambient light rejection from the side
- Color performance
- Color performance with ambient light
1)RGB and Gamma screen behavior
This was the simplest test of all. I prepared my instruments, calibrated my i1 Display colorimeter with my i1 Pro spectrometer, and started the measurements. I placed the instrument as close to the surface as possible for accurate measurements, taking advantage of this possibility that only a UST projector can offer.
I managed to obtain a well-calibrated result on the white reference card with my AWOL projector. With a DeltaE 2000 error of a minimum value of 1, I had finally my baseline measurements to test the Celexon’s behavior.
And here are the results on the Celexon screen with the exactly same settings on my projector.
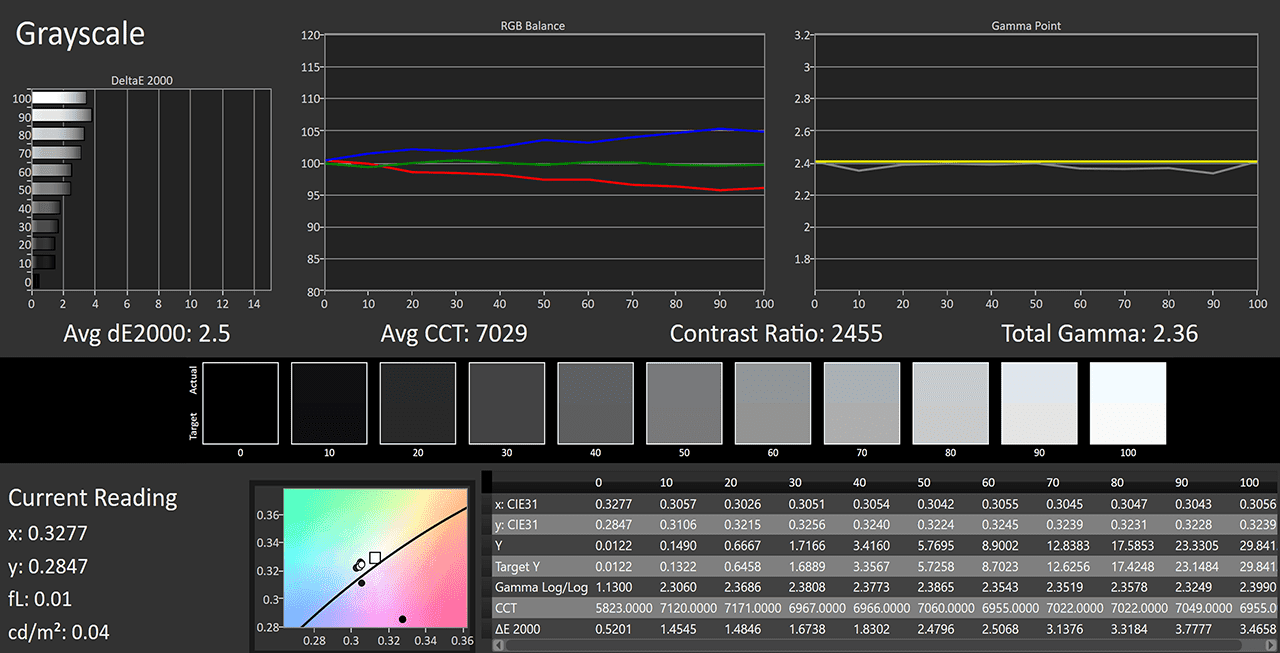
The DeltaE error increased by 1.5 units, going from 1 to 2.5. However, the gamma curve remained almost perfect, and the RGB balance shifted linearly to colder values, with an average grayscale temperature of ~7000 Kelvin. For my eyes, this indicates excellent ALR behavior. As I expected, the CLR fabric slightly cooled the image, but not significantly. I only had to make a small decrease to the blue gain on my projector to achieve a perfectly calibrated image with a balanced 6500K temperature on the Celexon fabric.
To provide a reference and evaluate the Celexon results, I conducted the exact same measurements on my Vividstorm screen.
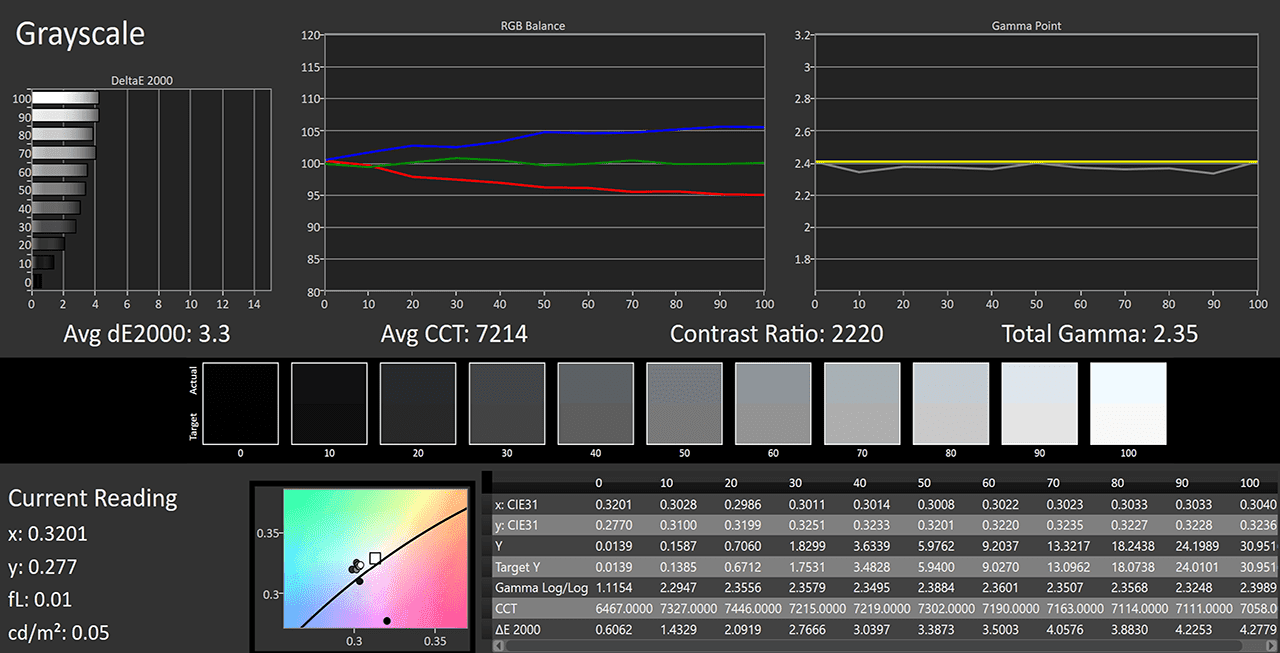
On the Vividstorm screen, we observed almost identical behavior but with slightly different, slightly worse results. The DeltaE error increased to 3.3 units from 2.5 on the Celexon, and the overall temperature was even colder at ~7200 Kelvin. Most importantly, the black level was slightly worse on the Vividstorm.
The black level measured on the Celexon was 0.0122FL, while on the Vividstorm it was 0.0139FL. This represents a 12.3% better black level for the Celexon. Although this may seem like a small difference, it’s worth noting that the overall contrast values also differ.
In the case of contrast, the difference is notable. The native on/off contrast ratio for the Celexon is 2.455:1, whereas for the Vividstorm, it’s 2.220:1, representing a 10.6% better contrast value for the Celexon screen. Even though a 10% difference may not seem significant, the better blacks on the Celexon were visibly noticeable to me from the first moment, and these measurements confirm what I observed.
Comparing the results from the white reference card measurements with those from the Celexon reveals a significant difference. With the same projector settings, the black level measured 0.0307FL on the white “screen” and 0.0122FL on the Celexon screen. This translates to a remarkable black level boost of almost 3 times on the Celexon fabric compared to the white card.
As for brightness, we lose some light, but what is the real gain of the Celexon screen? On the white card, we measured 54.920FL on full white, whereas on the Celexon, it was 29.842FL, resulting in a gain of 0.54 on the Celexon fabric. On the Vividstorm, the gain value measured at 0.56, which explains the slightly brighter 100% white measurement of 30.951FL on the Vividstorm compared to 29.841FL on the Celexon.
In conclusion, based on these measurements, I can confidently say that the Celexon micro black grid fabric has a practical gain of 0.54 in real viewing conditions. This translates to a 46% loss of the maximum brightness of our projector. However, this loss is accompanied by a significant 60% increase in black levels. This combination is nothing short of magic – pure technological magic.
The fabric exhibits linear variable gain performance, with a gain of 0.54 on full brightness, gradually decreasing to below 0.40 as we delve deeper into lower brightness images. In other words, there is a linear decrease in the gain factor by 0.14 from full brightness to zero IRE .
The result of this black boost is a general improvement of the native on/off contrast on our projector image by 27.3%. This improvement is particularly more than notable for DLP technology projectors.
I also appreciate when a manufacturer provides real numbers in the specs. The fact that Celexon declares a 0.5 gain for this screen, and my measurement was so close to this number, instills confidence in the brand’s integrity and accuracy.
These measurements were conducted using a 0.25 throw ratio UST projector, specifically my AWOL LTV-3000pro. It’s important to note that there are other projectors on the market with different throw ratios, such as the 0.23 Formovie or Nexigo Aurora Pro (stay tuned for a full review of this amazing projector here at projectorjunkies), or even the 0.19 throw ratio of the Samsung LSP9. As a result, the measurements may vary slightly due to differences in the projecting angle, considering the standard 45-degree orientation of the fabric’s reflective blades.
2)Ambient light rejection from above
This was one of the most interesting and challenging tests I’ve ever conducted on a screen. It was demanding, but I thoroughly enjoyed the entire process, as it allowed me to gain a deeper understanding of how this new CLR fabric technology performs in real viewing conditions!
Now, you might be wondering about the complex lighting setup I used for these measurements. Well, I simply turned on the lights in my living room, folks! That’s right, I wanted to test the screen under typical viewing conditions to see exactly how it performs when the lights are on. I’ve compiled all the measurements into a file to save you from being overwhelmed by individual screenshots.
Here they are…
Let’s analyze those measurements. At the bottom of the file, we can see the clean measurements of the screens with ambient light but without any projected image. For a white surface emitting 2.41FL of light, the Celexon screen reflects back only 0.17FL, which is just 7% of the light.
This means that Celexon has a real ambient light rejection rate of 93%.
This is incredibly impressive.
Also, take a look at how ambient light totally affects the black levels on the white reference card, increasing it (basically destroy it) from 0.03FL to 2.46FL. In contrast, the Celexon screen maintains its black levels much better under the same ambient light conditions, measuring only 0.18FL from 0.012FL.
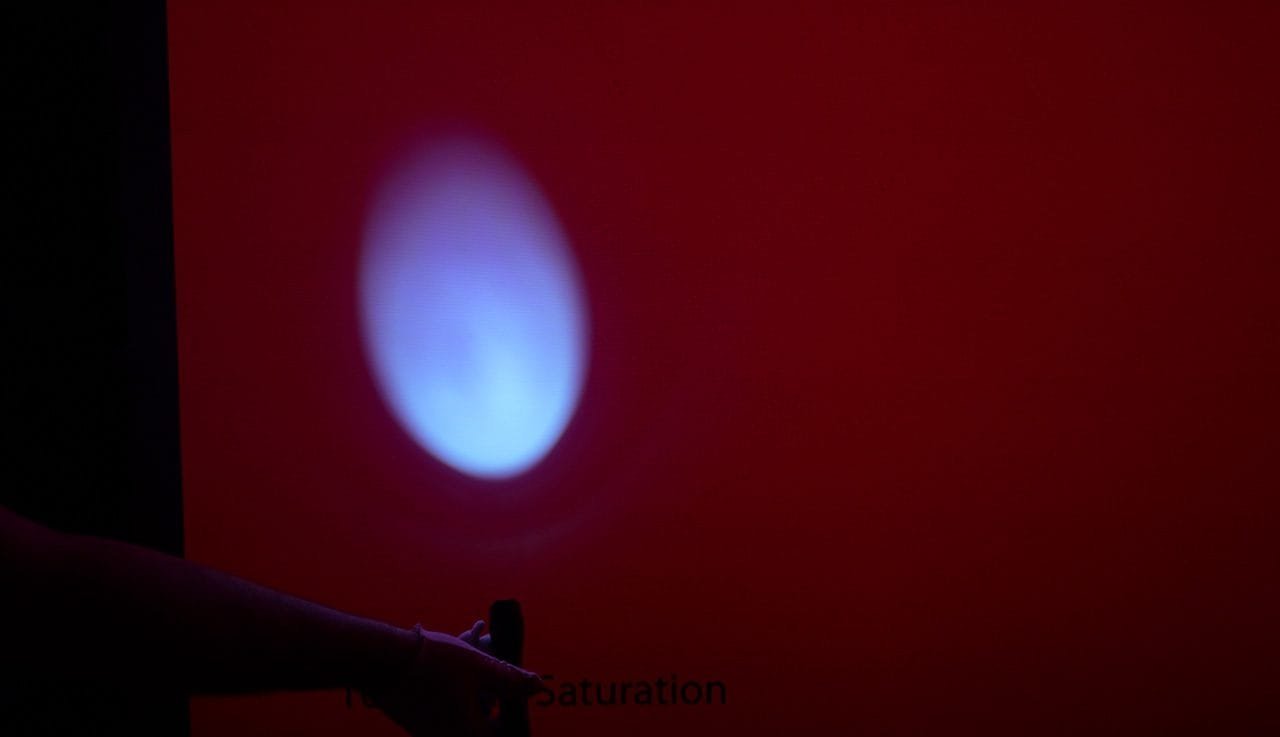
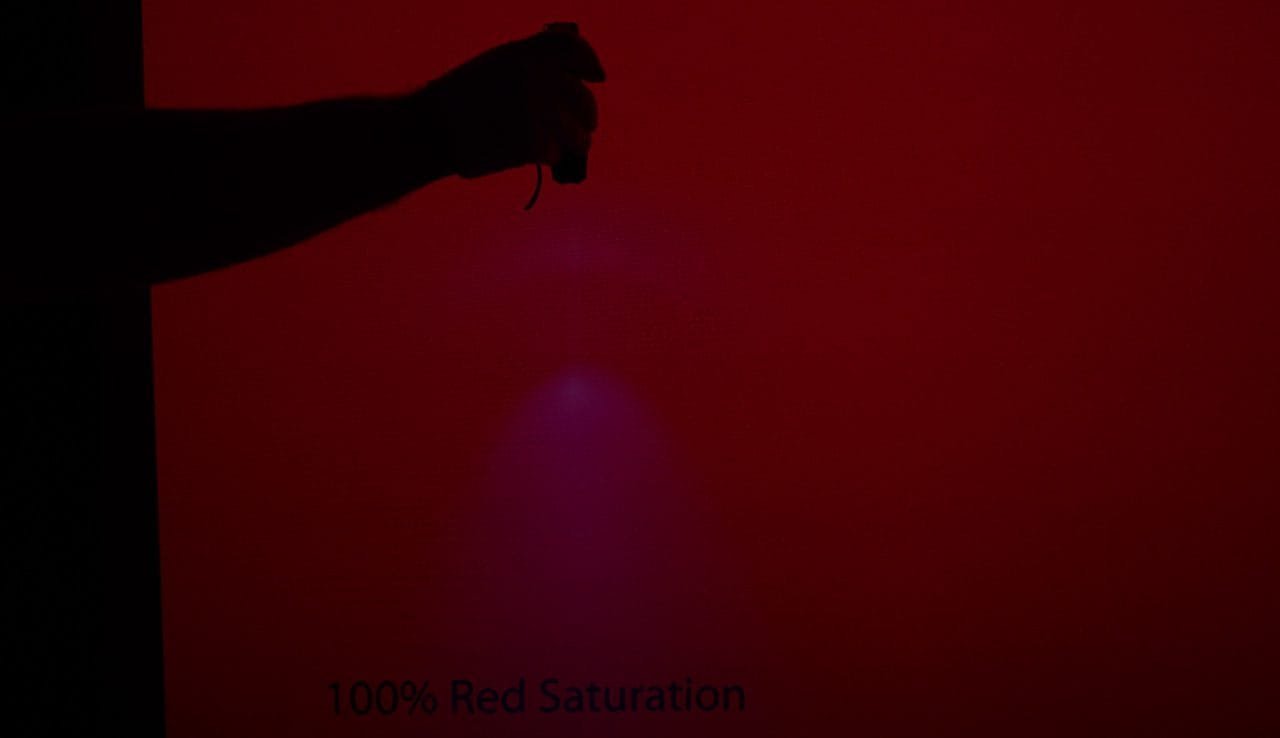
To better illustrate this 93% ambient light rejection, I will provide two photos. In each photo, I am holding a flashlight aimed directly at the screen from different directions while a projector displays a RED 100% pattern to make the effect more apparent. These images will help you understand how effectively the Celexon fabric rejects ambient light.
Flashlight from below
Flashlight from above
Now you know…
For reference purposes, I conducted the same measurements on my Vividstorm screen. The only difference was the slightly different angle of the ambient light, as the Vividstorm was positioned 15cm further back on my furniture, and I couldn’t adjust the ceiling light. As a result, the reflected light measured slightly higher on the white reference card (2.69FL instead of 2.41FL).
The results for the Vividstorm were similar and also impressive. The screen reflected back only 0.24FL from the original 2.69FL, which is just 9% of the light.
Therefore, the Vividstorm has a real ambient light rejection rate of 91%, which is also superb for this amazing screen
I am not sure you understand how crucial are these numbers for your viewing experience. It’s a game changer, you will never have to worry about ambient light again when you enjoy your content on your laser TV. But the most impressive is Celexon behavior on the ambient light rejection that hiding on the rest measurements on this file.
In these measurements i just added my AWOL on the equation. The impressive on these measurements is that Celexon keep the unreal ambient light reject capability linear throw the whole grey scale. So the overall picture gamma remain at high contrast levels and the quality of the projecting image remain largely unaffected, even with the lights on.
My initial impression of the Celexon CLR screen’s capabilities aligns with the measured data, confirming its outstanding ambient light rejection rate of 93%. This isn’t just a specification number, it’s a real-world performance metric that speaks volumes about the screen’s effectiveness in challenging lighting conditions.
3)Ambient light rejection from the side of the screen
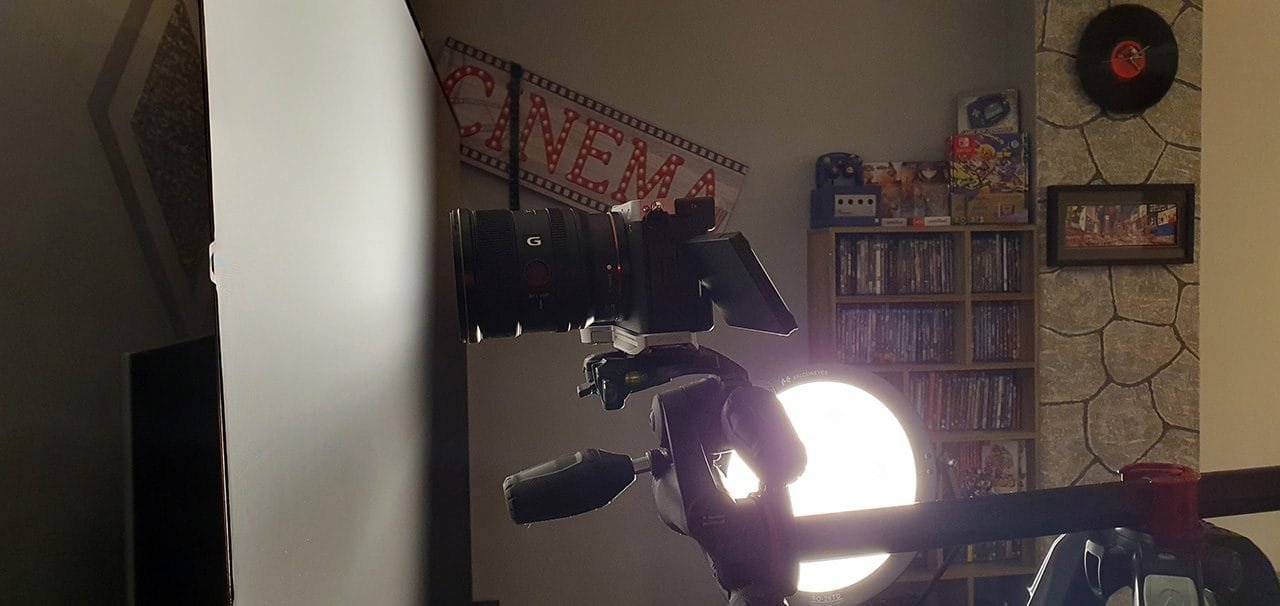
This measurement wasn’t also easy to take. I hadn’t so strong side ambient light in my room so i had to improvised a little 🙂
I used an LED panel light, so the conditions were not quite what I was hoping for. I wanted a natural ambient lighting environment, but it wasn’t possible. Therefore, the results will be somewhat artificial, as the light is just a beam with a specific angle. Keep that in mind as a footnote
And here are the results, on the left the Celexon measurements and on the right the white reference card measurements, with light on of course.
What do we see here? With the lights on, the white reference card reflects exactly 15.87FL to my colormeter. Since it is considered a ‘gain 1 white,’ this amount of light serves as a reference for our measurements on the Celexon screen. The Celexon fabric reflects only 3.34FL back. So, we observe a decrease in light reflection by 78% compared to a typical white surface. This number surprises me, I must say. A 78% rejection of side ambient light is almost unreal, but it’s happening. I measured it, at least in this artificially lit environment I created.
4)Color performance
How about the color performance? I followed the same approach here regarding the measurement method.
I took a measurement of the REC.2020 color space on the white reference card. Here are the results:
And then I took a measurement with the exactly same settings on my AWOL on the Celexon screen.
The results are equal to my eyes, so as a conclusion we can say that Celexon is quite neutral in terms of color performance. This micro black grid technology does not affect color performance (saturation) of our projected image at all.
5)Color performance with ambient light
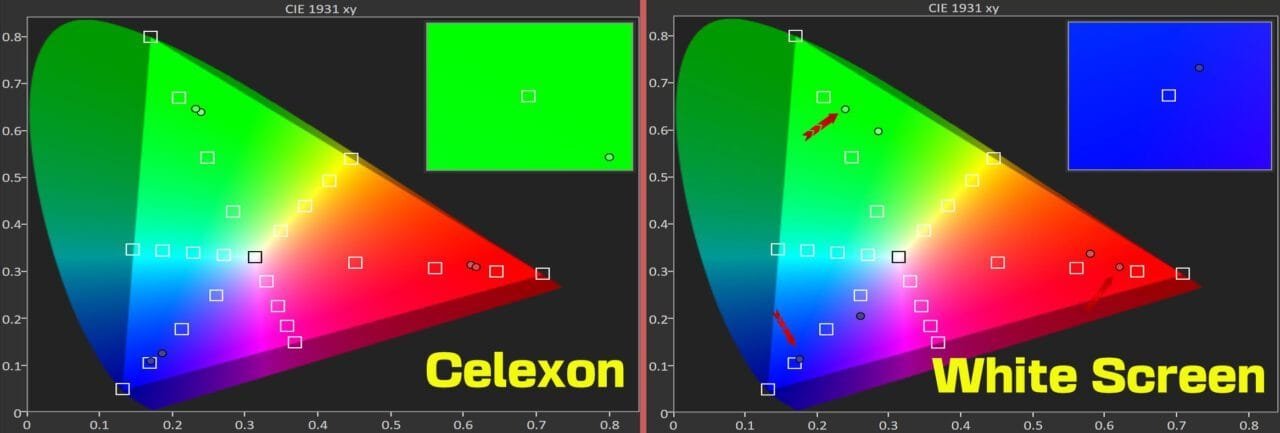
Finishing the measurements, a thought struck me: how about color performance with ambient light? When we have ambient light in a normal projection with a white screen, we immediately notice not only the contrast loss but also a washout of colors. So, perhaps we also experience a drift in color saturation. How much? Can we measure that? Yes, we can.
I used the 75% saturation pattern for our three basic colors, red, green, and blue. As we can see on the diagrams with the red arrows pointing to the correct values measured on both the white and Celexon CLR surfaces, I then turned on the ceiling lights and repeated the same measurement.
On the white surface, the color saturations tend a lot towards the center (white), and this is exactly why the colors seem so washed out on our white screen when the lights are on.
On the Celexon CLR fabric, the saturation of the three basic colors exhibits admirable stability. This is the reason why we see such natural and rich colors on our CLR screen even with the lights on! Now you (we) see and know the exact amount of color saturation loss we experience projecting on a white surface compared to this amazing micro black grid fabric when there is uncontrolled ambient light in the room.
Overall performance
And i am asking you, after reading all these measurements, how do you think Celexon screen performs? Lets see…
Starting with the viewing angle, Celexon claims about a 170-degree angle of view, which initially seemed quite extreme for this type of fabric technology. However, after conducting a thorough test, it became evident that the screen is indeed capable of meeting or even exceeding this claim.
This is 10 degrees angle
This is 100 degrees angle view
And this is 170 degrees angle view
I don’t having to add something more on this one…
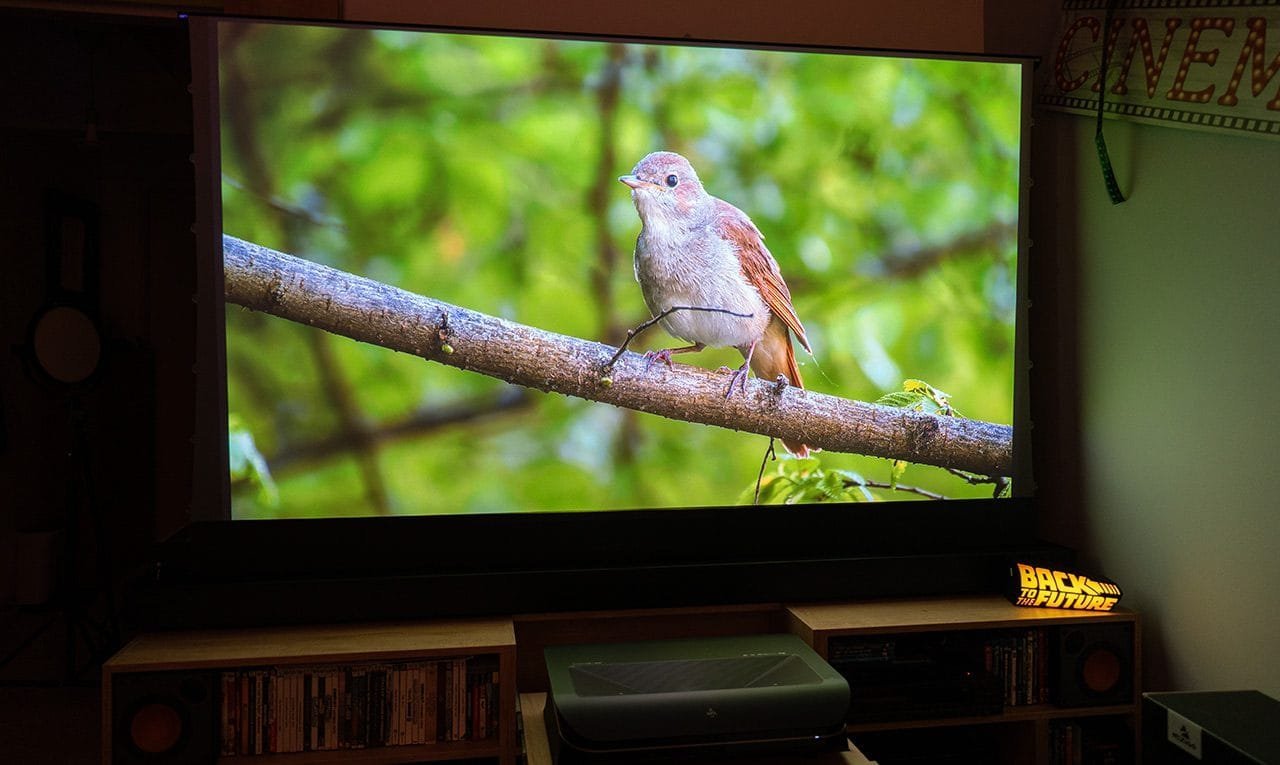
Let’s proceed to the actual picture quality of the projected image and some points i highlighted…
4K Sharpness
The huge number of micro horizontal reflective blades and the absolutely smooth surface of the fabric help the 4K resolution hold its ground, ensuring high-resolution sharpness even if you come really close to the screen. The screen surface plays a huge role in the final result in terms of sharpening and granularity of the image.
This picture was taken just 40cm from the screen surface, totally amazing…
Viewing experience
The environmental isolation offered by this screen is impressive. What I mean is that when you sit comfortably on your couch and start watching your documentary, movie, or whatever you’re watching, the screen completely absorbs you. It’s hard to explain with words. It’s as if you can see and understand more of the content, if that makes any sense to you. It somehow has a positive effect on your concentration, regardless of what you’re watching. A large screen, rich colors, deep blacks, and excellent ambient light isolation—those are the logical explanations I can think of, and Celexon offers all of them.
Blacks
Oh boy, if I had to choose only one reason why I would buy that screen, it would be the blacks! (Okay, the electric flap too, I can’t lie.)
The contrast boost offered by this amazing advanced technology screen is incredible. Everything seems more natural and vibrant (even with a gain of 0.54 and a significant loss of projector brightness) thanks to this contrast injection by the fabric. It’s quite difficult to explain on paper. If you have the opportunity to watch a Celexon CLR at a dealer shop or a friend’s house (if you live close to me, you are welcome), or if you buy it for your personal home cinema, only then will you understand exactly what I’m talking about here.
There is no article, picture, or even a video that can convey the image quality that your brain receives from this screen, especially when paired with a good RGB Laser UST projector like my favorite AWOL. We’re talking about the ultimate TV killer combination, not only in terms of picture size but also in overall image quality! Who would have imagined that 4-5 years ago? No one!
And all this with the “disappearing” style foldable screen that, when closed, gives no indication that with the push of a button, in a few seconds, a giant 100′ (or 120′ if you have the space) high-quality image will pop up in your room out of nowhere, if you know what I mean.
Ansi contrast
This is something I almost forgot to mention. The ANSI Contrast, for anyone who doesn’t know, is the contrast value when blacks and whites coexist in the image frame. Usually, this is a weak point for projection systems, as ambient light and reflections from the projector beam itself in the room can degrade image contrast, especially when bright and dark objects are present in the same frame (more reflections are caused by the bright points of the projected image).
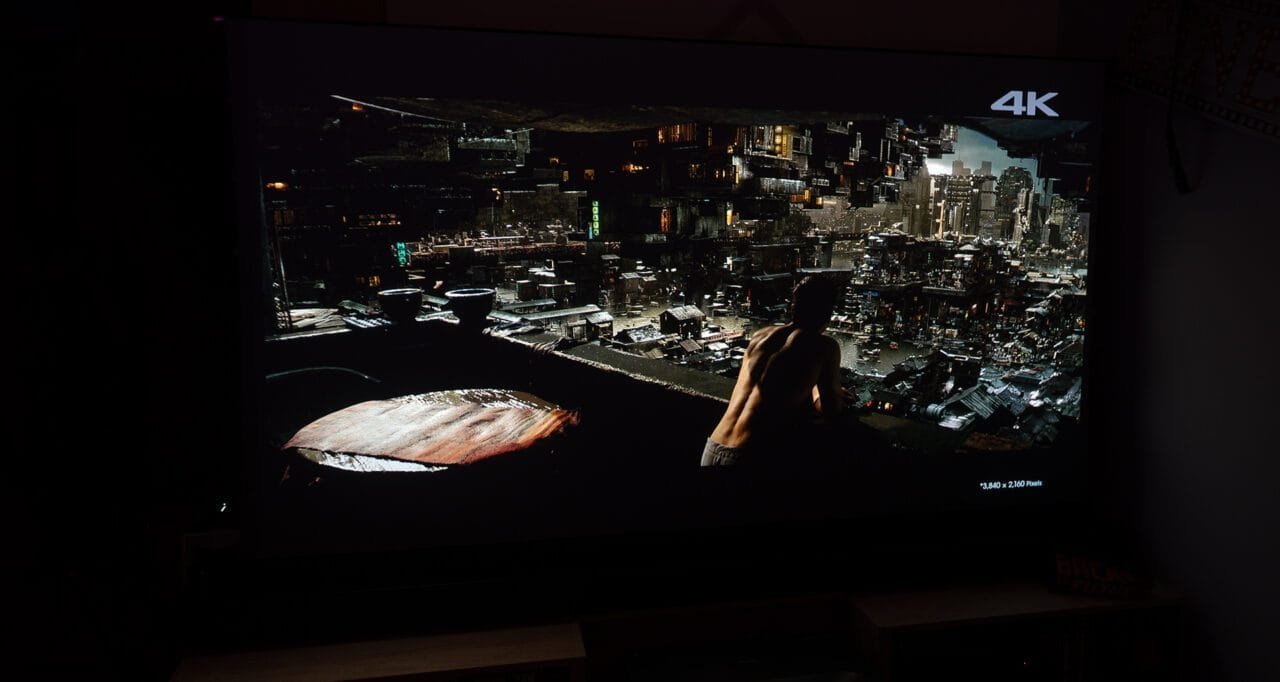
This is where a screen like the Celexon CLR offers the most significant and substantial improvement to the viewer. The brightness of bright objects in the frame does not affect the darkness next to them, giving rise to what’s known as the “OLED effect.” In practical terms, this means an impressive and high-contrast image, even when the frame contains both bright and dark details.
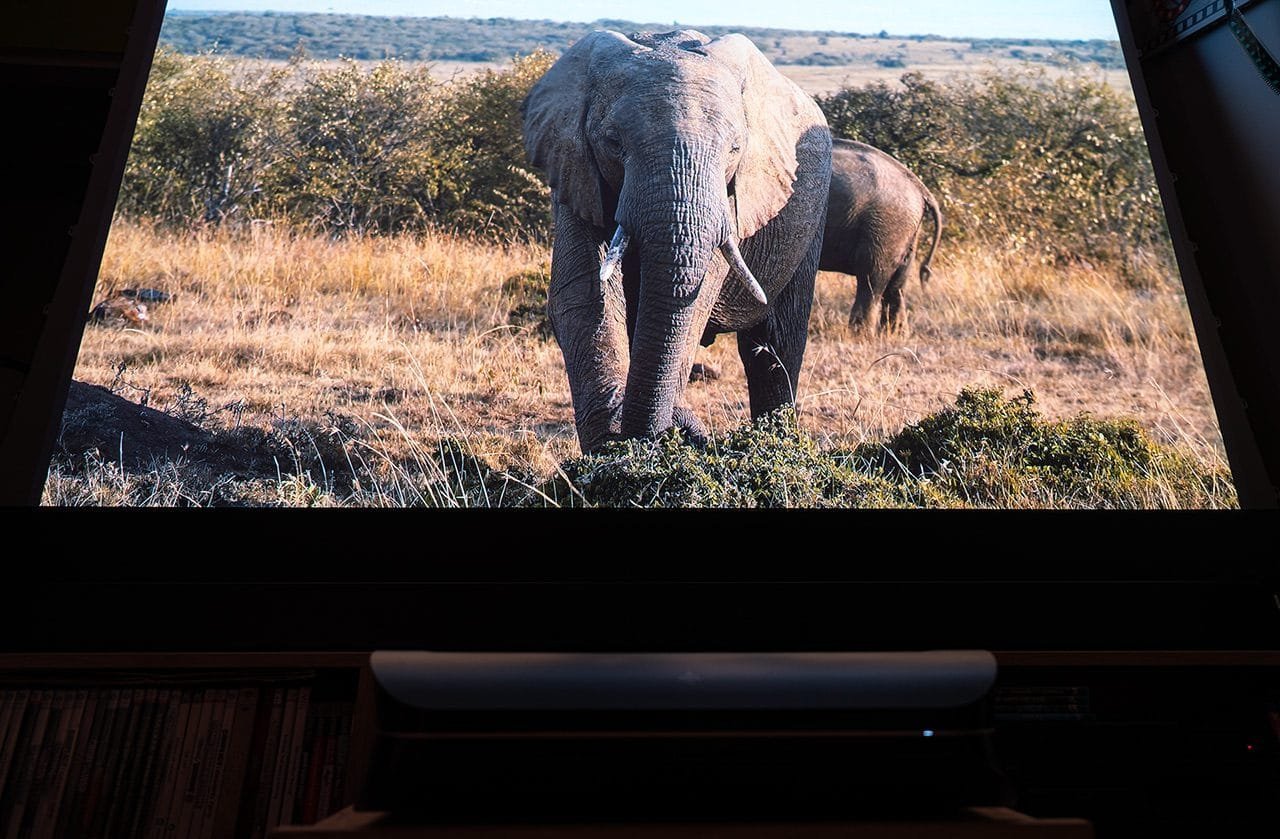
Images like the following can only be enjoyed in this quality on a projection system that includes a screen with CLR technology. Not even high-end projectors like the JVC NZ8, paired with an expensive Stewart screen for example, can compare with this combination—not even close. The Celexon CLR retains brightness in specific parts of the screen and prevents it from bleeding into the black areas like no other screen does.
Celexon boost blacks and contrast to the highest levels on scenes like this one
As always here is a small video i prepared for you just to taste the “backstage” of this long term review.
My thoughts about Celexon CLR screen
Celexon, with this new “plus” version of the floor rising CLR screen, ticks all the right boxes for an enthusiastic Laser TV fan like me.
It offers a high-quality housing with a clever mechanism that seals the valuable CLR fabric and protects it from the environment (which is so important for a normal living room). The dual motor design, hidden rising carrying handles, and adjustable rotating feet are just a bonus. Additionally, this CLR fabric offers unreal ambient light isolation and a significant contrast boost, making viewing with a good UST Laser projector an unforgettable experience. As my measurements showed, it has one of the most advanced foldable CLR fabrics out there in terms of performance, and seeing this pioneering fabric technology taking steps forward makes me really happy as a projector junkie 🙂
The screen is not cheap, it’s quite expensive. However, if you want to buy the best electric floor rising CLR/ALR screen on the market right now, this is the way to go.
Finally, the Celexon screen left me somehow with a bittersweet taste because I have to redesign my furniture, as the screen housing is a bit longer than the Vividstorm due to the extra motor for the flap mechanism. But this is something I have to do. Unfortunately, there is no turning back for me after all this time I spent with the screen making this review. Sometimes ignorance is bliss my friends, and most importantly, it keeps you out of trouble most of the time!
Here is the official link of the Screen in case you want to take a look
celexon UST Hochkontrast Bodenscheren Leinwand – HomeCinema Plus
(No affiliate links, no commissions, no indirect sales, just clean passionate reviews here, sorry guys 🙂 )
See ya on my next article folks, hope you enjoyed this review.
Until then, take care yourselves and of course the most important, enjoy your personal home cinema!
Nikos Tsolas




















4 Comments
What a great, detailed review, thank you so much, I really appreciate it! I’m thinking about getting the 100 inch version of this screen together with a Hisense PL1SE because this combination seems to offer great value =)
Sadly there is no way to contract the author or editor. The article say three sizes up to 120-inch.
The website says 4 sizes max size is 110-inch.
Just checked, for me it shows 80, 92, 100, 110 and 120 inch as available sizes
Celexon home cinema V2.0, is this screen also of the same quality in terms of image and quality as celexo home cinema plus?
I own an Awol vision 3000 pro, but this type of projector costs £3199 120 inches, I would like to know if the celexon home cinema V2.0 is also as good because it costs €2699, which is a big difference for me.??